Advice & Inspiration
Hosta Plant Care

If you’re a hosta fan, you’ll know that these striking woodland foliage plants are an absolute essential for a shady garden. You’ll also know that they’re kind of addictive, with so many tempting colour combinations, leaf shapes and textures that one or two plants can swiftly lead to a full on collection! But if you’re just starting out with your first hosta, there are a few things you’ll need to know in terms of hosta plant care to get the best from your lovely new addition.
Rest assured, once they get going, hostas are easy going plants with low maintenance needs. Here’s what you need to know to get them off to the best start.
Jump to:
- Where to plant
- When to plant
- How to plant
- Hosta care
- Problems with slugs
- Other problems
- Caring for hostas in winter
- Dividing hostas
Where to plant hostas
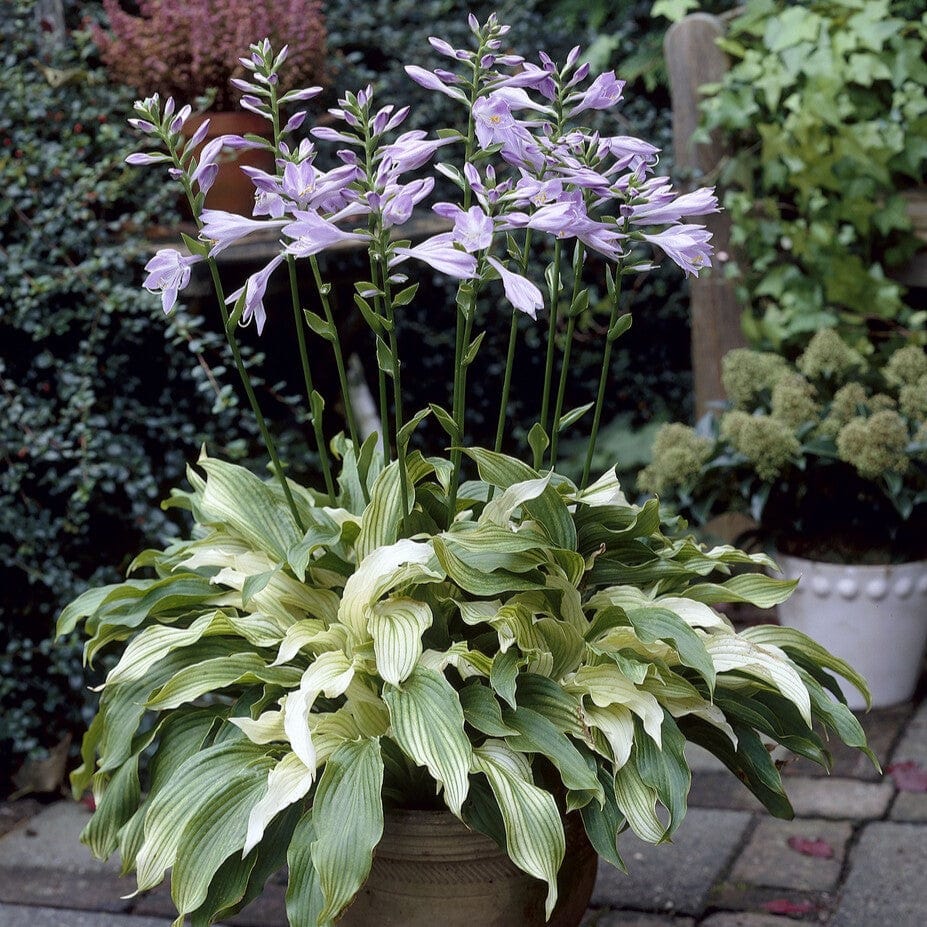
Most hostas prefer a position in light or medium shade, but this does vary with the leaf colour. Those with blue or turquoise tones prefer light shade, and yellow toned hostas like a bit more sun. A large leaved hosta is a great choice for a front or mid-border position, under a tree or in a large pot, while the miniature or more upright hosta varieties are ideal for smaller containers or even hanging baskets.
Hostas do best in moist, fertile soil, so if yours is on the heavy clay or sandy side, you should mix in some compost or manure before planting. They’re pretty hardy plants, so you can plant them in a less sheltered or a north-facing spot. Hostas are also suitable for bog gardens or by the side of a pond (but not in the water) as they like wet soil.

When should you plant hostas?
Hostas can be planted at any time of the year as long as the soil is warm enough to dig a hole, and not too dry or frozen. The best times are in spring or autumn, as the plant then has plenty of time to establish itself before it has to deal with any extreme temperatures in summer or winter.

How to plant a hosta
Once you’ve chosen the perfect position for your hosta, it’s time to plant. Dig a hole at least as big as the root ball, tease out the roots if they’ve got compacted in the pot and position your plant in the centre of the hole. Replace the soil (and compost if you’re using it) and firm it down gently around the base of the plant before giving your hosta a good watering.
If you’re planting more than one hosta, leave about 90cm between each one to allow them to spread out fully (check the mature size of your particular hosta though, as they do vary quite a bit). A layer of mulch applied around the base of your new plant will help to nourish it, keep moisture in the soil and reduce weeds. The same method applies whether you’re planting your hosta in the ground or in a pot.

Hosta care
Watering hostas
When your hosta is newly planted, you should water it fairly regularly. Once it’s established (after about a year), you can ease off, as the plant should only need watering during hot or dry weather.
The soil should always feel damp to a depth of 15cm, and shouldn’t ever dry out completely - the hosta’s leaves will start to turn brown around the edges if this happens. Hostas in pots will need more regular watering than those in the ground.
Feeding hostas
In most garden soils, all your hosta will need by way of feeding is a yearly mulch with well rotted manure, compost or leaf mould.
If your soil is especially poor or your hosta isn’t thriving, you can boost it with a general purpose fertiliser a few times throughout the growing season and especially at the start of spring when the new foliage starts to emerge. Plants in pots may need more regular feeding.
How to care for hostas in pots
Start by choosing a pot at least 30-45cm deep and wide, with good drainage holes in the bottom to prevent waterlogging. Make sure you plant your hosta so the top of the root ball is at the same level as it was in the nursery pot, and water it thoroughly, then let it drain.
Hostas like their roots to be cool in summer, so avoid any pots that will heat up too much, such as those made of metal. The bigger the pot the better, as compost dries out quickly in smaller pots and you’ll need to water more frequently.
Pruning hostas
Hostas don’t need to be pruned - another reason we love them! If you want to tidy them up a bit by removing any damaged or ugly looking leaves though, go ahead. The same applies to the flower stalks once the blooms have faded, but it won't do any harm to leave these in place until late autumn, when the plant naturally dies back anyway.

The elephant slug in the room
There’s no getting away from the fact that slugs love hostas. A few nibbled leaves aren’t going to damage the plant significantly, but it doesn’t look great and if you have a lot of slug activity, this can weaken the plants, especially when they’re young or newly planted.
To protect your plant against slugs and snails, a good way is to create a barrier against them. I’ve had the best results from copper in the form of tape or wire, but you can also get good protection from crushed eggshells, straw, wood chips or gravel.
It’s not a good idea to use slug pellets, as these can poison animals such as hedgehogs which eat slugs. If you do find you’re fighting a losing battle against the slimy menace, you can try choosing a thicker leaved hosta variety, which they find harder to nibble through, or planting your hostas alongside slug resistant plants.

Other hosta problems
The good news is that you shouldn’t have any other problems, as hostas are generally disease resistant. Apart from the slugs, the main thing to watch out for is sun damage. If your hosta gets too much direct heat and light, the leaves can become brown and scorched - if this happens, you’ll need to dig it up and replant it somewhere shadier.
How to care for hostas in winter
Don’t be alarmed if your hosta seems to disappear over winter - the plants naturally go dormant and die back around late autumn. You’ll see new foliage starting to emerge in mid spring. Hostas don’t usually need any winter protection, but if there’s a severe frost predicted and you’re worried about your new shoots, you can protect them with horticultural fleece or bubble wrap until the cold snap passes.
Dividing hostas
After a few years your hostas might start to outgrow their space. If this happens, you can re-invigorate them and create new plants by dividing them. To do this, carefully dig up your hosta in autumn or spring with a garden fork, then cut the plant in two (or more if it’s particularly large).
Make sure each piece has at least two healthy shoots and plenty of roots, then replant them straight away, putting the new plants in a different place or in pots. Give your new plants a good watering and a sprinkle of plant food to get them going. They should grow identically to their parent plant, and flower the following year.


